
Hello, in a previous post I talked about how excitied I was to finally try Kitchen Litho as it is known. Here is my attempt at a how to on the process. It is not a very hard proccess at all , or even that long winded, and I am sure you could have a go and have loads of fun with it !
I originally found this process in a copy of Printmaking Today, back in 2012 written by a lady called Emilie Aizier-Brouard.
Step 1: Gather STUFF!
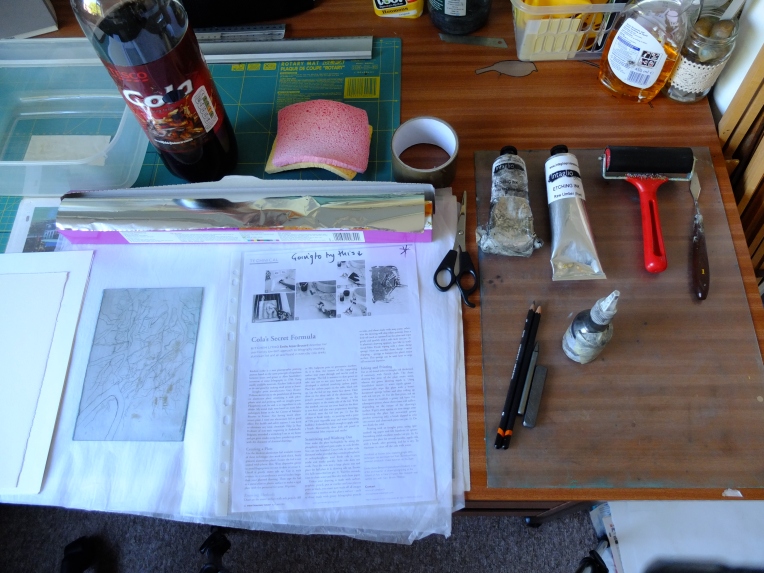
- Cola (fresh is better )
- Aluminium foil (the stronger the better )
- tape ( parcel is better )
- clean damp sponge (the wetter the better !!… er, no, wet but not dripping is best)
- a plastic or metal sheet to wrap foil around
- thick oil based ink and roller
- a plastic tub to hold you bath of cola. (not shown here )
- Paper to print on , and blotting paper if using soaked paper
- Drawing materials: softest graphite, anything oily to make a mark with , permenant markers, biros. (plenty of chance to experiment here )
Step 2: Preparing your plate ( fiddliest bit)

You will be drawing on the mat side of the foil, BUT BE CAREFUL NOT TO TOUCH IT WITH YOUR BEAR HANDS ! Any hint of grease will show in your final print ( see my print below *sigh*), wear disposable gloves to be sure, I did not have any to hand….
Take your plate , I used an old bit of perspex to wrap my foil around. Cut the foil larger than your plate . then with mat side out ( make sureit is resting on something clean and grease free) wrap your sheet.

Here is the back side of my wrapped and stuck plate. Parcel tape is good, as it is water resitant and thin . Make sure that there are not any gaps or holes where cola can get underneath your foil otherwise it will get messy! Cola squirting out when you least expect it …
I used clean( ish ) tissue paper to work on to help keep the plate grease free.
Step 3 : Drawing on the plate

I chose a picture that I thought would suit the sketchy line style that this printing process is best at.
I kept to a simple selection of drawing materials, soft grapihte pencil ( 8B or 9B is best) and a graphite stick, again soft.

You have to keep your hand from touching the suface as you draw. I like this as it keeps you from spending too long on the drawing . From my brief foray into this process the print quality is lovely but leans towards the informal. It would be hard to make it very clean and precise. I might be wrong and would love to know what other people are doing with the process.

Finished drawing
Step 4: Sensitizing the plate

Pour your fresh cola into a plastic tub, enough to submerge your plate, and leave for 5 seconds and then go and rinse with clean water. Simple as that !!
IF I had used other drawing tools, such as oil pastels, and was going to try to print in another colour other than black, I would now have to wash off the drawn marks after sensitizing the plate. To do this you pour a little oil ( such as rapeseed) on the plate and wipe it off quickly and gently with a soft cloth, you should see a phantom image apear . then wipe over with a clean damp sponge . If you left marks on the plate which left a residue, when you tried to ink it up it would clog.
The phosphoric acid and gum arabic in the cola makes the areas that have not been drawn on , hydrophilic. This means water will sit in a film on the surface, but be repelled from the drawn areas, which will catch the ink from your roller.
Senefelders Maxim – water repels grease.
Step 5: Inking and Printing

Ink rolled out , Im using intaglio ink, Raw Umber and bone black . Thick ink is important, but I’m not sure why!


Before you roll your ink over, you need to make sure you wipe over your plate with your wet sponge, getting the right amount of water on the plate is important and you will just have to try it out and see what works for you.
When you first ink up your plate it will need several passes of ink , wiping over with your sponge in between, and probably will not be as dense a print as the next one, as more ink gets built up on the plate. 
You can see here where in the top half of the image I touched it with my fingers it has picked up my finger prints, woops! If there are areas where ink is gathering and its not supposed to be , you can use a brush dipped in cola to clean off those areas .

Printing using my mini printing press.
I tried both damp and non damp paper , using a spoon as a baren and the printing press to compare results. I will post the results in another entry.
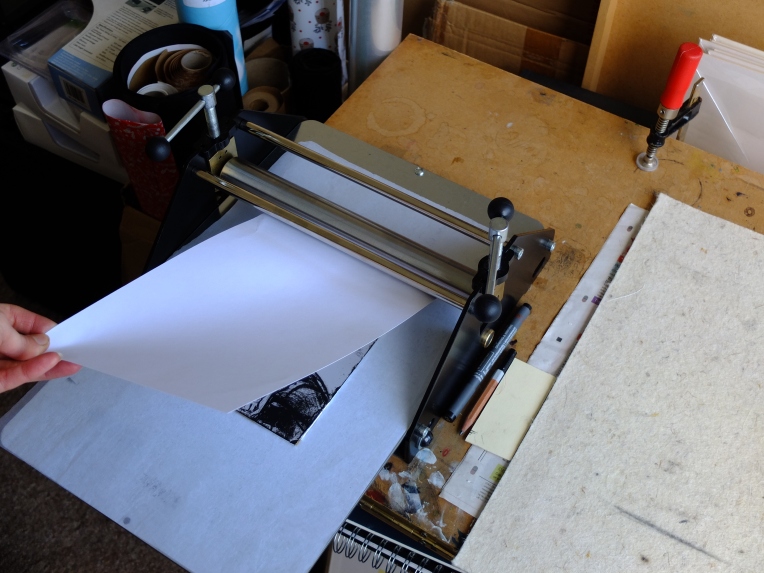


I got at least 10 Prints from this plate , and I think I could get more from it which is pretty good going.
My technique needs perfecting as my plate gathered quite a bit of ink as it went along. I will try;
less ink on roller,
adding chalk to ink to make it thicker,
wiping with sponge before every pass of roller,
and having roller that is same size as plate.
and being more careful touching the edges of my plate in the first place !

