Here I found a lasercut piece of mdf that was hanging around the workshop, and I thought I could use it to try a multi colour print.
It was engraved by the laser so I could of just inked it with a roller and printed, or printed it like an intaglio print. As there were different levels to the engraving I thought I would blend the techniques.
And at the time I thought I was doing viscosity printing but doing more research after, I did it slightly differently to the general way you apply ink in viscosity printing.
Viscosity printmaking is a way of applying different coloured ink onto the same plate, utilising the way ink will react to each other if they have different viscosity (thickness or oilyness)

Here is the plate after I had scraped yellow ink into it, as you would an etching or collograph plate. Yellow ink or at least the etching ink here is naturally runnier than other pigments, I don’t think I altered it with anything, thinking as it was going to be the lowest inked bits it wouldn’t matter ( not quite right!)

Then I wiped it with scrim…

Then I mixed an orange ,

I applied this layer of colour with a soft neoprene roller, the idea being the soft roller deposits the ink on some of the lower areas. When I rolled it over though, the orange covered most of the yellow I could see! Anyway I carried on with my next colour.

Contrasting pale blue I thought would pop out, and the idea behind viscosity printing is the layering of colours without them blending, so this colour would be a good test of that thought I.

Here is the plate before I rolled the blue on, which I made a stiff ink , by adding some chalk to, or magnesium carbonate works as well.

When I rolled the blue on with a firm roller, it did not stick very easily , because I had got the order muddled up. A stiff ink wont stick to an oily ink , but oily will stick to stiff.

Either way , into the relief press it went. I used damp paper and some felt blanket for a soft packing so the paper would be pressed into the blocks low places.
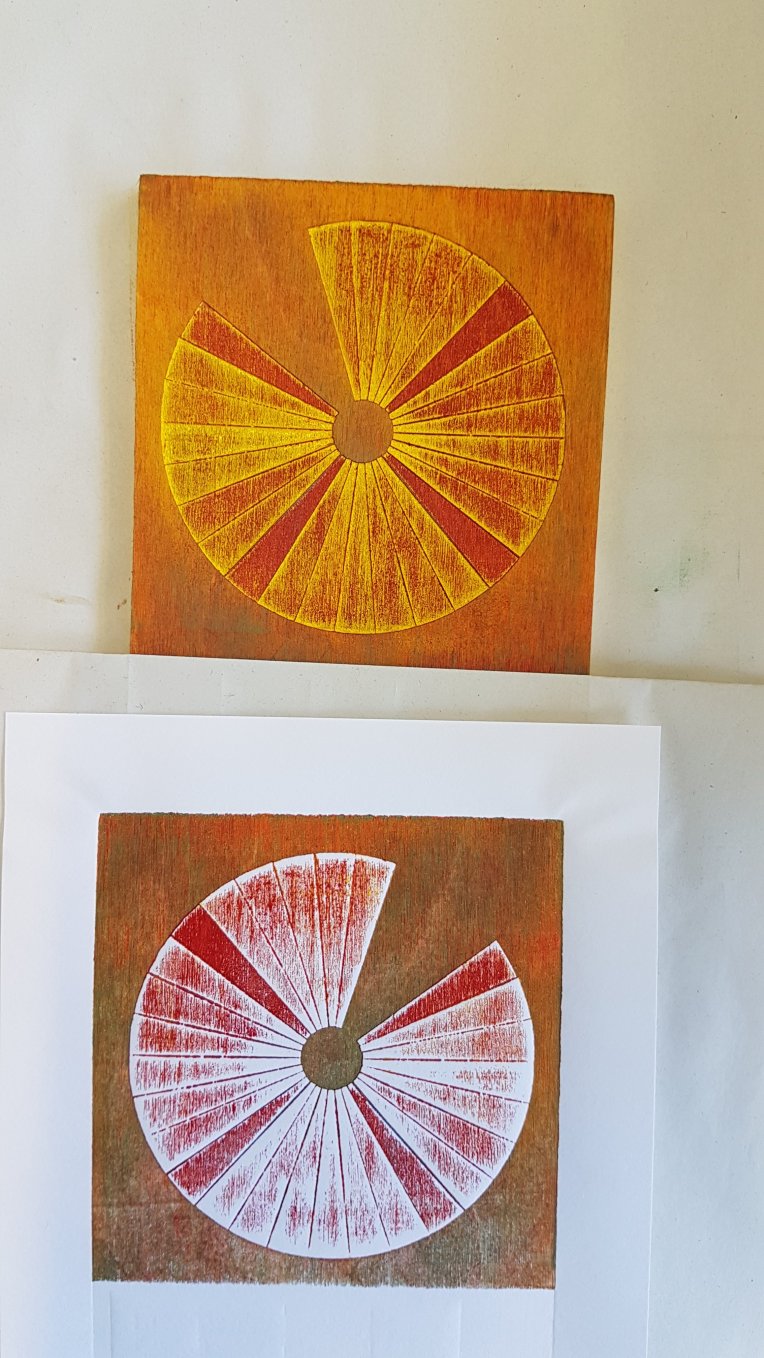
Here is one of the prints I took. I like the way the ink had blended on the highest points, but that wasn’t what I was going for. But cutting myself some slack, the ply wood had a textured surface so it wouldn’t have been a solid colour whatever I did perhaps .
It was an interesting block to ink up, and I learnt a lot about layering ink by doing it wrong and I’ve almost remembered the mantra stiff wont stick to oily… I think..
Thanks for reading, happy printmaking.